Last Updated on July 20, 2023 Sarah Gayda
In my presales role, I speak weekly with dozens of companies of all shapes and sizes and to date, I have not found any two companies exactly alike. What I mean is that I find it fascinating how every company has their own unique business processes for creating content, such as blogs, presentations, reports, or any other document that typically leverages the Microsoft 365 (Office 365) stack of applications. Some of these process flows are thought through and formalized by a governance team, but most just evolved according to how the end user feels comfortable working. In many cases, each user has their own content creation process, depending on their understanding of M365. This does not mean that all processes are equally effective. My goal in this article is to outline how Colligo leverages Microsoft 365 to create content, such as this blog article, using Microsoft apps.
All content, including blogs, takes time and effort to write. Many do not think of it in this way, but within an organization, writing a blog is a knowledge management process. When your content is properly tagged and filed, it facilitates the resurfacing of that content later to be referenced, reused, or leveraged, or as a basis for an iterative blog article. Leveraging your vetted and published content tends to result in new blog articles that are polished and faster to write. The same applies to corporate memos, meeting outlines, and any sort of document with business value. Microsoft 365 provides a large quiver of tools for content creation, so you can take many different routes. We will cover the content management process, step by step, that has worked successfully for us. Ready to get started?
Step 1: Brainstorm topics
Tool of choice: Teams
We utilize the Microsoft Teams Chat tool to collaborate with team members. We have a Team for Marketing and a channel called ‘blogs and articles’ where we brainstorm asynchronously. Using the @mention function, we can direct our comments at individuals or use @channel to notify those who are actively using this channel.
We find Microsoft Teams is great for 1:1 and 1-to-many conversations to vet ideas and for creating a list of topics to address, even scoping out a top-level outline for a blog. These potential topics are usually discussed over several days to several weeks accessing Teams from a variety of devices, especially mobile. With Teams now eclipsing 115 million active users, increasingly your team will be collaborating in MS Teams.
Step 2: Draft an outline and bullet points of content
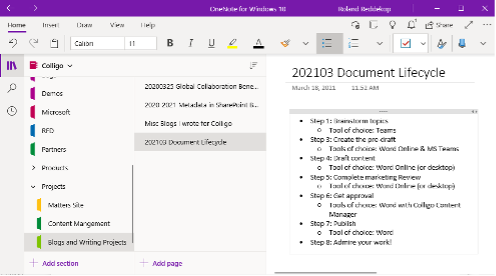
Tool of choice: OneNote Online
After we have the kernel of an idea and assigned a person to write the blog article, we recommend they work out their initial draft utilizing Microsoft OneNote. OneNote is our tool of choice for documenting ideas, meetings with clients, and creating a personal knowledge base. Most of the company works remote, so OneNote is perfect because it provides a personal, synced notebook that cannot be lost and can be accessed from a variety of devices, even on the go using the mobile app. Writing blogs is hard work, so it is comforting to know your hard work is auto-saved and in the cloud.
At this stage, the author of the blog article will expand the outline, add some cursory bullets of content, and include the reference URLs from websites or from our internal SharePoint knowledge base. We do not suggest the author invest too much time in the finer details of writing sentences and paragraphs at this point because the direction could change on review. Little time is spent on grammar at this stage.
Step 3: Create the pre-draft
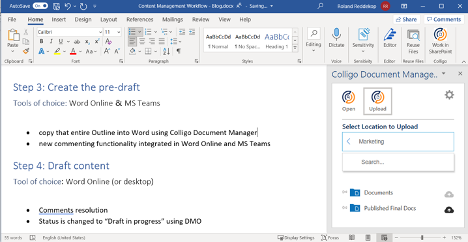
Tools of choice: Word Online & MS Teams
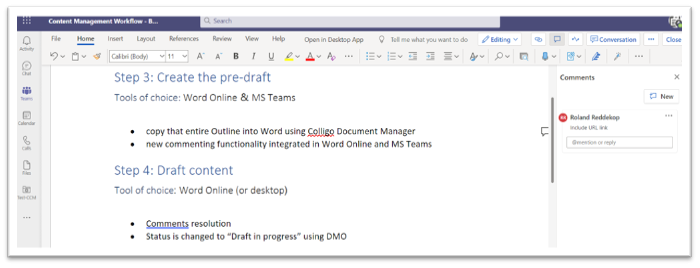
Once the author has worked out the fuller outline of bullets and references in OneNote, they will copy that entire Outline into Word and use Colligo Document Manager to post it in the files section of the Marketing team’s Blogs and Articles channel for a review. Typical metadata we use for our Blog Content Types includes title, target publish date, status = “Draft for Review”, author, and topic category. (See our recent blog post here for the importance of metadata). Now the file has entered your company’s repository. This makes the document an important asset for your team and company, and one that can be shared and collaborated on.
We love the new commenting functionality integrated in Word Online and Microsoft Teams that makes it simple to highlight points and @mention others to weigh in. We choose the Reviewing mode to add comments and type suggested changes into the document, which show up automatically in a different colour. The ability to assign a task to a coworker while posting a comment is a terrific way to ensure accountability and keep the ball moving forward efficiently. Some key paragraphs can be written at this time, but we save the final wordsmithing for the next stage.
Step 4: Draft content
Tool of choice: Word Online (or desktop)
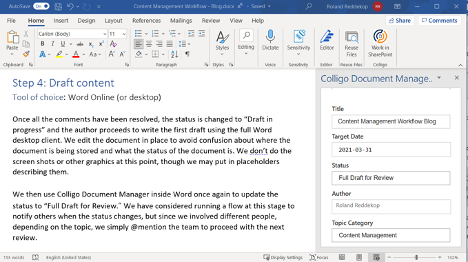
Once all the comments have been resolved, the status is changed to “Draft in progress” and the author proceeds to write the first draft using the full Word desktop client. We edit the document in place to avoid confusion about where the document is being stored and what the status of the document is. We do not add the screen shots or other graphics at this point, though we may put placeholders in describing them.
We then use Colligo Office Connect inside Word once again to update the status to “Full Draft for Review.” We have considered running a flow at this stage to notify others when the status changes, but since we involved different people, depending on the topic, we simply @mention the team to proceed with the next review.
Step 5: Complete marketing review
Tool of choice: Word Online (or desktop)
Our marketing team reviews the blog, carefully paying attention to grammar and working with the author to add the screenshots and other images needed to communicate effectively. Again, we use the online Word Reviewing function inside Teams to reword awkward sentences, add additional content, and strike out excess content. This review is very iterative, and it would not be surprising if 20-25% of the content is changed at this point. We believe it takes 2-4 reviewers to ensure the content is complete and meaningful from a variety of perspectives.
Step 6: Get approval
Tools of choice: Word with Colligo Document Manager
With everyone pleased with the result, we trust our Marketing team to approve the document using Document Manager. Usually there is a finalization of charts and images just before the article is ready to go live on our website.
Step 7: Publish and admire your work!
Tool of choice: Word
The nice thing about finalizing our blog in Word is that most website content management systems can import Word files (or accept a copy and paste from Word) and translate the formatting and layout into the equivalent online styles. So, we just download the Word file and pass it on to our web team for final publishing.
Time to sit back, enjoy the fruits of your labour, and watch your audience engage.
Your team can also utilize tools like the Dynamics 365 Marketing product, if available, for publishing the content, but we will save that for another post!
Step 8: Ensure future value from your content
Tool of choice: Colligo Content Manager
The content lifecycle does not end here. With our blog article sitting in SharePoint, properly tagged and with a retention label for preservation, the knowledge can add future value to your organization. Colligo Content Manager is a fantastic tool to explore and add tags to the knowledge base of documents in your organization and leverage the power of SharePoint in a more intuitive and user-friendly way.
Please be sure to send us your success stories trialing this process or share with us what content management workflows function best for your organization.

